

You can use native Exchange utilities, like Exchange Management Shell (EMS) or Exchange Admin Center (EAC) to export user mailboxes to PST file. However, you can export only a single mailbox at a time using the Exchange Admin Center. If you want to export multiple Exchange mailboxes to PST, you can use the PowerShell cmdlets in EMS. In this article, we will describe the process to export multiple Exchange mailboxes using the PowerShell cmdlets.
Why do you need to Export Multiple Exchange Mailboxes to PST?
Here are some reasons why you may need to export multiple Exchange mailboxes to PST files:
- You may need to export old mailboxes to PST files to free up space from the database.
- When employees leave the organization, you can export their mailboxes to PST files for backup or archiving purposes.
- You can export the mailboxes to PST files for creating backup. This backup can come in handy in case of accidental data loss, mailboxes corruption, or any other issue.
Stepwise Process to Export Multiple Exchange Mailboxes to PST
You can follow the below stepwise instructions to export multiple mailboxes to PSTs using the PowerShell cmdlets.
1. Assign Required Roles and Permissions
You need to ensure that the user account you will be using to export the mailboxes has the required roles and permissions assigned. To export mailboxes to PST using the Exchange Management Shell (EMS), your account must have the Mailbox Import Export role assigned. You can assign the Mailbox Import/Export role to your user account using the Exchange Admin Center. Follow the steps given below:
- Open the Exchange Admin Center (EAC).
- Click on Permissions > admin roles.
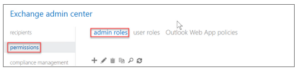
- From the list of role groups, locate Organization Management, select it, and click on the Edit icon.

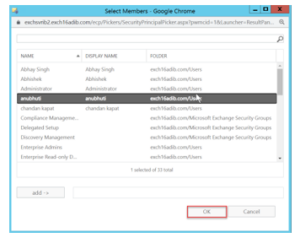
- Navigate to the Members section in the edit window and click on the add (+) icon.
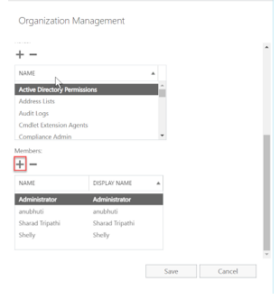
- Select the user account and click on OK.
- Click on Save.
Alternatively, you can use the PowerShell cmdlet to assign the role to your user account. See the example below:
New-ManagementRoleAssignment –Role “Mailbox Import Export” –User “<Username>”
![]()
2. Set up UNC File Path to Save Exported PST Files
You need to specify a location where you want to save the exported PST files. For this, you need to create a UNC file path or a shared folder location. You also need to share the created folder with Exchange Trusted Subsystem and set the permissions to Read/Write. To do this,
- Create a folder at any location on your Exchange Server.
- Right-click on the folder and select Give access to > Specific People.
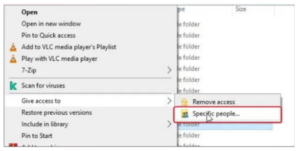
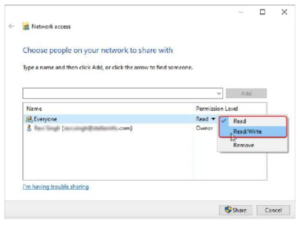
- Select Everyone (not recommended) or your username (recommended) from the dropdown and click Add.
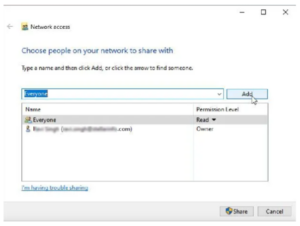
- Select Read/Write permission and click Share.
- Note down the shared network path. For example, \\exsrv\d$\pst.
3. Export Mailboxes to PSTs
You can use the New-MailboxExportRequest PowerShell cmdlet in Exchange Management Shell (EMS) to export the mailboxes to PST format. You need to use the foreach loop with the cmdlet. This will export all the mailboxes in the database. However, you need to first create a variable to store all the mailboxes that are in the database using the command below:
$Mailboxes = Get-Mailbox
Here, $Mailboxes is the variable. It stores mailboxes in the database that are being fetched by the Get-Mailbox cmdlet.
Now, you can use the New-MailboxExportRequest cmdlet with the foreach loop to export all the mailboxes to PST (see the below example).
foreach ($Mailbox in (Get-Mailbox)) { New-MailboxExportRequest -Mailbox $Mailbox.alias -FilePath “\<server FQDN>\<shared folder name>\$($Mailbox.Alias).pst” }
This command will export all the mailboxes from the database to PST files and saved them at the location specified in the command.
4. Check the Status of Export Request
To check the status of export request, you can use the Get-MailboxExportRequest cmdlet (see the below example).
Get-MailboxExportRequest -Mailbox $Mailbox.alias | Format-List Name,FilePath,Mailbox,Status
This cmdlet will show the progress of export request.
If you want to search and view the detailed status of export requests, run the cmdlet as given below:
Get-MailboxExportRequest [[-Identity] <MailboxExportRequestIdParameter>] [-DomainController <Fqdn>] [-ResultSize <Unlimited>] [<CommonParameters>]
Drawbacks of the Above Manual Method
The manual method described above has some drawbacks, such as:
- The method only works when the Exchange Database is online.
- Additional roles and permissions are required to export the mailboxes to PSTs.
- The cmdlet will export all the mailboxes that are present in the database to PST. It cannot be used if you want to export some specific mailboxes to PSTs.
Conclusion
There are various reasons why you may need to export multiple mailboxes to PST. You can run the New-MailboxExportRequest cmdlet with foreach loop to export all the mailboxes in a database to PST. However, using this cmdlet to export mailboxes to PST has a few drawbacks that are mentioned in this article. To overcome the drawbacks, you can use an advanced EDB to PST converter software, such as Stellar Converter for EDB. It can export multiple mailboxes from online or offline EDB files to PST and various other formats. This software scans the EDB files and list all the extracted mailboxes in a preview window. You can granularly select the mailboxes from this list and save them in PST format. It can also export the mailboxes directly to a live Exchange Server or Office 365 (Microsoft 365) account.
Related News:
Still Using ‘123456’? World Password Day Says It’s Time to Upgrade